Original link : http://www.photoshopessentials.com/essentials/image-resolution/
Image Resolution, Pixel Dimensions and Document Size in Photoshop
Written by Steve Patterson.
A lot of people, whether new to Photoshop or not, are confused by the term “image resolution”.
Question: “Is it like a New Years’ Resolution where I have to give something up for a month?”
Answer: “Nope, not that kind of resolution. And, I think you’re actually supposed to give something up for longer than a month. But no, that’s not it.”
Answer: “Nope, not that kind of resolution. And, I think you’re actually supposed to give something up for longer than a month. But no, that’s not it.”
Question: “What about, like, ‘resolving’ a problem? That sort of resolution?”
Answer: “Nope. Well, kinda, in the sense that understanding image resolution can definitely solve a lot of problems. But really, no.”
Answer: “Nope. Well, kinda, in the sense that understanding image resolution can definitely solve a lot of problems. But really, no.”
Question: “Hmm… Oh, I know! You mean, like, Prince & The Resolution, from the 80′s – Purple Rain, Let’s Go Crazy, that sort of thing?”
Answer: “Umm…. no. And, you’re thinking of “Revolution”, not resolution. Still, no, that’s not it either.”
Answer: “Umm…. no. And, you’re thinking of “Revolution”, not resolution. Still, no, that’s not it either.”
So if it’s not something you give up, has nothing to do with resolving an issue, and doesn’t involve doves crying or partying like it’s 1999, then what exactly is "image resolution"? Well, let me throw one more thing in there that image resolution has nothing to do with, and that’s how your image looks on your computer screen. That’s right, the resolution of your image has absolutely nothing to do with how your image appears on screen. It does, however, have everything to do with how your image will print.
Let’s repeat that one more time. Image resolution has absolutely nothing to do with how your image looks on screen. It has everything to do with how it will print. Let’s examine things further.
Download our tutorials as print-ready PDFs! Learning Photoshop has never been easier!
Pixel Dimensions
Here’s a photo I took one day while strolling through a park. I saw this little guy (or girl, who knows) posing for me on the flowers and happened to have my camera handy. My camera, by the way, is an 8MP camera, and the reason why I’m telling you this will be explained shortly.
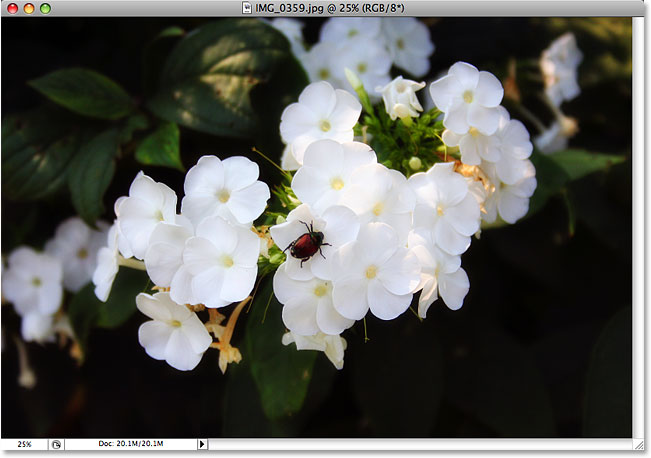
Obviously, the photo you’re seeing above is a much smaller version of the photo, since the actual-size version would be too large to fit on the screen. Let’s pretend though for the sake of this lesson that we’re working with the full size version of the photo. In order to see exactly how large the photo is, once we have it open inside Photoshop, we can simply go up to the Image menu at the top of the screen and choose Image Size from the list of options, which will bring up Photoshop’s Image Size dialog box, as shown below.

The Image Size dialog box can seem a bit frightening and confusing, but it’s not meant to be and really, it’s quite simple. It’s divided into two sections, Pixel Dimensions and Document Size. For the moment, let’s ignore the Document Size part and focus only on Pixel Dimensions.
The term "pixel dimensions" here, to me, is confusing because it sounds like we’re talking about the dimensions of each individual pixel, and that’s not the case. What Photoshop is really telling us is the width and height of our image in pixels. In other words, how many pixels are in our image from left to right, and how many pixels are in our image from top to bottom. It’s also telling us one other important piece of information which is the file size of our image. The dimensions and file size shown here are of the full size version of the photo above (the insect on the flower) before I resized it to something more suitable for a web page. So here, Photoshop is telling me that my photo has a width of 3456 pixels and a height of 2304 pixels. In other words, it contains 3456 pixels from left to right, and 2304 pixels from top to bottom. To find out exactly how many pixels I have in my photo then, I can simply multiply the width times the height, which in this case is 3456 x 2304, which gives me a grand total of 7,962,624 pixels. That’s a whole lot of pixels.
Remember earlier when I mentioned that the camera I used to take this photo was an 8MP camera? Well, the "MP" stands for "mega pixel", and "mega" means "million", so "8MP" means 8 million pixels. This means that when I take a photo with my digital camera, the photo will be made up of 8 million pixels (approximately, anyway). If you have a 5MP camera, your photos will be made up of 5 million pixels. 4MP cameras give you photos made up of 4 million pixels, and so on. So if we take a look again at what the Pixel Dimensions section of the Image Size dialog box is telling us about my photo above, it’s saying that my photo has dimensions of 3456 pixels wide by 2304 pixels high, for a total of 7,962,624 pixels, which is pretty darn close to 8 million, and that’s why my camera can be sold as an 8MP camera.
So that’s what the first part of the Image Size dialog box is telling us – the width and height of our image in pixels. So far so good. Let’s take a look now at the second part of the dialog box, Document Size, which is where we really start to make sense of image resolution.
Document Size
So far in our look at image resolution, we examined the first section of the Image Size dialog box in Photoshop, "Pixel Dimensions", which, as a quick recap, tells us the width and height of our image in pixels, and tells us the file size, which is usually in MB (megabytes, or "millions of bytes"). Nothing terribly confusing here.
The second section of the Image Size dialog box is "Document Size", which can be a bit more confusing but really isn’t much more complicated than the Pixel Dimensions section. In fact, the two of them go hand in hand. Let’s take a look at the Document Size section, and by the time we’re done, you should have a pretty good grasp on the difference between the two and on image resolution itself.
Document Size goes hand in hand with Pixel Dimensions, yet is also completely separate from it. "Gee thanks, that really cleared it up," you’re saying. I know it sounds confusing, but bare with me for a moment. Notice at the bottom of the Document Size section, it says "Resolution", and in the Resolution box, it says "72". Notice also to the right of that is another box, this one saying "pixels/inch".
What this is telling us is that when we go to print the photo, 72 pixels out of our 3456 pixels from left to right in our photo (the width), and 72 pixels out of our 2304 pixels from top to bottom in our photo (the height), will be printed for every one inch of paper. That’s what "image resolution" means – how many of your image’s pixels left to right and how many of the pixels top to bottom will print in every inch of paper. Of course, an inch is a square, which means the number of pixels from left to right and top to bottom will always be the same, and that’s why the Document Size section contains only one number for Resolution. That number (72 here) represents both the left to right and top to bottom number.
So, if we have 3456 pixels from left to right in our photo, and 2304 pixels from top to bottom in our photo, and we have 72 pixels per inch listed for the resolution of our image, how large will our image actually be if we were to print it? Well, to figure that out, all we need to do is divide the width and height of our image (in pixels) by the print resolution (also in pixels). So let’s do that:
3456 divided by 72 = 48
2304 divided by 72 = 32
2304 divided by 72 = 32
After our simple math (yes I know, math sucks but this one’s easy), we find out that at a print resolution of 72 pixels per inch, our photo is going to be 48 inches wide by 32 inches high. That’s a huge photo! But wait a minute, didn’t we see those numbers 48 and 32 somewhere before? Why yes we did. Take a look once again at the Document Size section:
Look what values it’s giving us for the width and height of our image – 48 inches for the width, and 32 inches for the height. Exactly what we came up with ourselves when we divided the number of pixels wide and the number of pixels high by 72 pixels per inch (the resolution). And that’s really all that image resolution is. It’s how many if your image’s pixels will print inside every inch of paper, which then tells us how large the image will be when it’s printed.
Keep in mind as we’re going along that I keep saying "printed". I can’t stress enough, and this is the number one reason why so many people have a difficult time grasping the concept of image resolution, that resolution meansabsolutely nothing until you go to print the image. It has absolutely nothing to do with how your image appears on your screen.
Just to prove there’s nothing up my sleeve, let’s change the resolution value of the photo from 72 to, oh, let’s make it 300, which will mean that for every inch of paper when we go to print our image, 300 of our image’s pixels will be printed from left to right and 300 again from top to bottom. You can see the change in the screenshot below:
Now, since 300 of our image’s pixels from left to right are going to be fitting inside every inch of paper as opposed to only 72 pixels, it stands to reason that it’s not going to take 48 inches of paper to fit the entire width of our photo into. Likewise, since 300 of our pixels from top to bottom are going to be fitting inside every inch of paper as opposed to only 72 pixels, it shouldn’t still take 32 inches of paper to fit the entire height into. Just for fun, let’s do the simple math ourselves. Once again, all we need to do is divide the width in pixels and the height in pixels by the resolution in pixels. So let’s do that:
3456 divided by 300 = 11.52
2304 divided by 300 = 7.68
2304 divided by 300 = 7.68
According to my math, when I take 3456 pixels wide and divide them by 300 pixels per inch, that gives me 11.52 inches. Likewise, 2304 pixels high divided by 300 pixels per inch gives me 7.68 inches. In other words, when I take my photo that’s 3456 pixels wide by 2304 pixels high and print it at a resolution of 300 pixels per inch, my photo will be 11.52 inches wide by 7.68 pixels high. Let’s take a look at what the Document Size section is telling us. Am I right?
Looks like my math skills are stronger than ever (okay, so I used a calculator). Photoshop is showing us exactly what we expected, that at a resolution of 300 pixels per inch, it will take 11.52 inches wide and 7.68 pixels high to print our entire photo.
To summarize then, all "image resolution" means is how many of your image’s pixels will print inside every inch of paper. Again, it has no effect at all on how your image appears on your screen, since your monitor has nothing to do with your printer.
Pixel Size
There’s one other aspect that image resolution has to do with, and that’s the size of the pixels when you go to print the image. It makes sense, really. An inch is an inch is an inch. The size of an inch is always the same. It’s, well, one inch. So, since the size of an inch can’t change, the size of the pixels has to change. For example, in order to fit 300 pixels into an inch, you would need pixels that are considerably smaller than if you only wanted to fit 72 pixels into an inch. Sort of like how, if you wanted to fit 10 people into a phone booth, you’d need people who were considerably smaller than if you only wanted to fit 3 people in there. Fortunately, you don’t need to worry about that. Photoshop takes care of resizing the pixels for us. I just wanted to explain that "image resolution" really means two things – the number of pixels per inch that will be printed on the paper, and the size of those pixels. As I said though, Photoshop takes care of sizing them for us. All we need to do is make sure we’re using the correct value for "pixels per inch".
"Hey, wait a minute!" you’re thinking. "Correct value?! What correct value? There’s an actual number I’m supposed to use for resolution that’s ‘correct’?!"
Yep, there sure is. Well, if you’re concerned about image quality, anyway (and of course you are). We look at the "correct" resolution values to add for maximum image quality when printing in our next section – How Image Resolution Affects Print Quality.


